










Modern smartphone photography is a marvel of engineering, placing the power of a high-end digital sensor and sophisticated computational processing into a device that fits in your pocket. For millions of users, the iPhone has become the primary tool for capturing life’s milestones. However, the convenience of point-and-shoot technology often masks the complexities of light, motion, and hardware maintenance. When images turn out blurry, grainy, or poorly focused, it is rarely a failure of the device itself, but rather a misunderstanding of the variables at play. Improving your photography requires a transition from passive capture to active control.
The Anatomy of a Blurry Shot: Main Facts
At its core, a blurry photo is the result of three primary factors: motion blur, focus misalignment, or sensor limitations caused by environmental conditions. When a shutter stays open too long—a common necessity in low-light environments—any minor vibration in the user’s hand is translated into a smear across the image sensor. Similarly, modern iPhones rely on complex autofocus (AF) systems that track subjects in real-time. If the system locks onto the background rather than the intended subject, the image will inevitably lack the desired crispness.
Beyond these mechanical realities, physical obstructions are the most frequent, yet overlooked, culprit. A lens covered in natural skin oils, pocket lint, or residue can diffuse light before it ever reaches the sensor, creating a “dreamy” or hazy effect that no software filter can truly fix. Understanding that your iPhone camera is a precision instrument requiring regular maintenance is the first step toward professional-grade results.
The Lifecycle of a Photo: A Chronology of Capture
To understand how to prevent blur, it is essential to track what happens the moment you tap the shutter button:

- The Pre-Capture Phase (The Setup): The iPhone evaluates ambient light levels. If the scene is dark, the device automatically begins calculating a longer exposure time to compensate.
- The Focus Lock: The camera’s depth-mapping technology attempts to identify the subject. This happens in milliseconds, but it is prone to error if the contrast in the scene is low or if the user is moving.
- The Shutter Release: The sensor captures the light. If the phone is held with instability during this window, the image is compromised.
- The Computational Processing: Modern iPhones perform "Deep Fusion" or "Photonic Engine" processing. If the initial capture is too shaky or dark, the software tries to "guess" the details, leading to the "blocky" or "painterly" look often associated with digital noise reduction.
By intervening at each of these stages—cleaning the glass, locking the focus, and stabilizing the device—you move from being a victim of the algorithm to a master of the shot.
Supporting Data and Technical Variables
The Role of Lighting
Light is the currency of photography. In bright, daylight conditions, the iPhone’s sensor can use a very fast shutter speed, effectively "freezing" motion and ensuring sharp results. In low light, the camera is forced to slow the shutter speed down. For example, while a bright-day shot might have a shutter speed of 1/1000th of a second, a dark room might drop that to 1/30th of a second. At 1/30th, the slightest tremor in your hand becomes a blur.
Understanding Resolution and Frame Rates
While many users assume that higher resolution equates to less blur, the reality is more nuanced. Shooting in high-resolution modes or high frame-rate video requires more light. If you are shooting 4K video at 60 frames per second in a dim environment, your iPhone is forced to boost its ISO (the sensitivity of the sensor to light). High ISO settings introduce digital noise, which, when processed by the phone’s software, often appears as a loss of detail or "blurry" textures.
Professional Strategies: How to Improve Your Results
Physical Maintenance
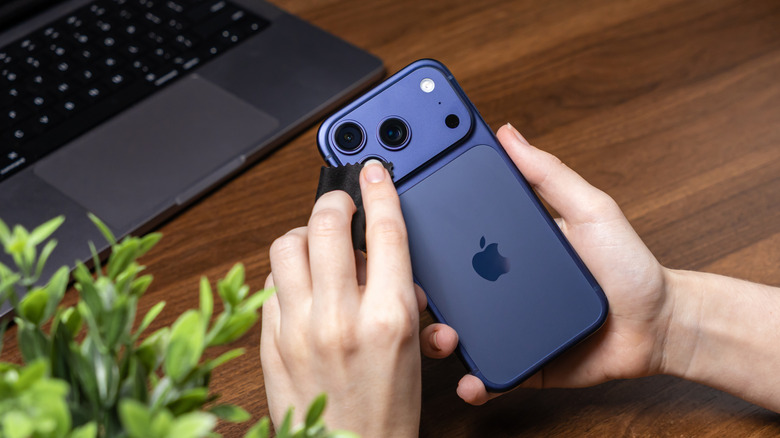
The most common mistake is cleaning the lens with clothing that contains abrasive detergents or lint.

- The Microfiber Rule: Always use a clean, dedicated microfiber cloth.
- The Deep Clean: If the lens has persistent residue, use a tiny drop of distilled water on the cloth. Never apply liquid directly to the lens, as it may seep into the housing and damage the seals.
- Case Check: Ensure your phone case is not casting a shadow or reflecting light back into the lens, which can cause internal lens flare.
Software and Interface Controls
Don’t rely solely on "Auto." The iPhone interface offers powerful, hidden controls:
- AE/AF Lock: By long-pressing on your subject on the screen, you engage the Auto Exposure/Auto Focus lock. This tells the iPhone, "This is what I want to be sharp, and this is the light level I want to measure." Once locked, the phone will stop hunting for focus, preventing the "bouncing" blur common in video.
- Exposure Compensation: Next to the focus box, a small sun icon appears. Slide this up or down to manually adjust the brightness before you shoot. Lowering the exposure slightly in bright light can prevent "blown out" highlights, while raising it in dark rooms can save a shot—though be wary of introducing noise.
Hardware Augmentation
Even the most stable hands have a limit. For long exposures (such as night photography or light trails), a tripod is non-negotiable. Using a tripod allows the iPhone to utilize its "Night Mode" to its fullest potential, capturing multiple frames over several seconds and stitching them together for a crystal-clear, low-light image that would be impossible to achieve handheld.
Implications for the Future of Mobile Photography
As we move toward the integration of AI-driven tools—such as those seen in recent iOS iterations—the definition of "blur" is evolving. Software can now identify a blurry face in a group shot and reconstruct it using generative data. However, reliance on software correction can lead to "uncanny valley" results where the photo looks processed rather than natural.
The trend in smartphone hardware is moving toward larger sensors and wider apertures. While this allows for better low-light performance, it also creates a shallower "depth of field." This means that while your subject may be razor-sharp, the background will be naturally blurred. Users must learn to distinguish between unintended motion blur (a mistake) and optical bokeh (a stylistic choice).
Conclusion: Developing the "Photographic Eye"
Eliminating blur is less about buying the latest Pro-series iPhone and more about understanding the limitations of the hardware you already own. By maintaining a clean lens, utilizing focus locks, managing exposure manually, and employing stabilization tools like tripods, you can elevate your photography significantly.
The iPhone is a powerful computer that happens to be an excellent camera. Treat it with the care of a professional piece of equipment, respect the physics of light, and you will find that the "blurry photo" problem—once a source of frustration—becomes a relic of the past. Whether you are capturing a fleeting moment at a family gathering or a static landscape at dusk, the difference between a throwaway shot and a portfolio-worthy image often comes down to those few seconds of intentional setup before the shutter clicks.