









Introduction: Elevating Beyond the Hot Shoe
Photography is, at its foundational core, the art and science of capturing light. While natural light offers breathtaking, organic results, relying exclusively on ambient illumination severely caps a photographer’s creative ceiling. Introducing an artificial light source transforms a shoot, granting absolute control over shadows, highlights, and subject separation. However, keeping a speedlight mounted directly to your camera’s hot shoe produces flat, clinical, and often uninspiring imagery.

Moving your flash off the camera is the single most transformative step a photographer can take to elevate their craft. By decoupling the light source from the lens axis, creators can sculpt subjects with dramatic side lighting, create gorgeous rim lights, and replicate the soft, directional qualities of natural window light anywhere.

Welcome back to Introduction to Flash Photography. Building on the principles of bounce flash and soft lighting discussed in our previous lesson, this guide dives deep into the nuts and bolts of taking your flash off the camera. We will explore the technological evolution of flash triggers, evaluate the primary categories of off-camera sync systems, examine essential support hardware, and review a highly recommended, budget-friendly starter kit.

A Note on Industry Vocabulary
Before exploring the mechanics of off-camera flash transmission, it is worth addressing an important shift in industry terminology. Historically, photography literature and equipment manuals heavily relied on the terms Master and Slave to describe controlling units and remote flashes.

Thankfully, driven by shifting consumer standards and a collective industry-wide push toward more inclusive, precise language, manufacturers and educators are actively retiring this paradigm. Modern technical guides favor descriptive, technologically accurate terminology: Transmitter and Receiver. These terms clearly denote the exact role each piece of hardware plays in the wireless chain, avoiding antiquated metaphors while improving overall clarity for beginners.

The Mechanics of Going Off-Camera: How the Signal Travels
To understand how off-camera flash functions, one must examine the precise micro-chronology of a photograph being taken. When a photographer presses the camera’s shutter button, a lag of slightly less than one-tenth of a second occurs before the mechanical shutter curtains actually begin to open. This microscopic window of time is where the magic of wireless flash synchronization happens.

Step-by-Step Chronology of a Wireless Flash Trigger
- The Shutter Activation: The photographer fully depresses the shutter release button.
- The Hot Shoe Signal: As the camera initiates the exposure sequence, an electrical signal is immediately routed to the camera’s hot shoe metal contacts.
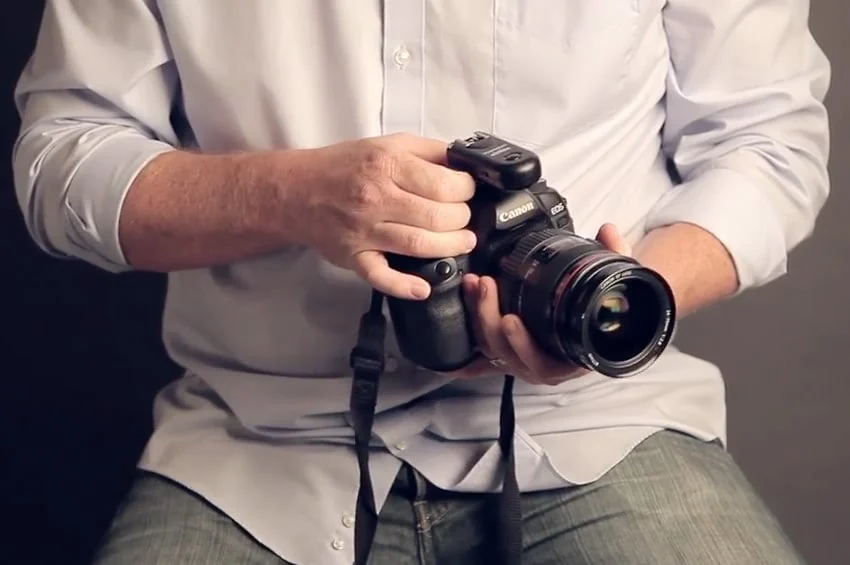
- Transmission: Instead of a flash unit, the hot shoe houses a radio transmitter (such as a Yongnuo unit set to Transmitter Mode). This device instantly intercepts the electrical signal and converts it into a high-frequency radio wave, broadcasting it outward in all directions.
- Reception: Positioned across the room, an identical radio unit—set to Receiver Mode—constantly listens for incoming frequencies. Upon catching the broadcast wave, the receiver instantly translates it back into an electrical impulse.
- The Flash Burst: This electrical pulse travels through the receiver’s hot shoe directly into the attached off-camera flash unit, triggering it to fire in absolute synchronization with the opening shutter curtains. The entire flash burst is delivered and completed within the exact fraction of a second that the sensor is exposed.
While this wireless radio sequence represents the contemporary gold standard, several alternative systems exist. The primary differentiator among off-camera flash systems is the specific medium used to transport the triggering signal from the camera body to the remote flash unit.

Comparative Analysis of Off-Camera Flash Systems
Photographers have four primary methodologies for bridging the gap between their camera and remote flash units: hardwired connections, basic optical triggers, proprietary pre-flash systems, and modern radio triggers. Each comes with distinct cost implications, technical limitations, and performance metrics.

1. Hardwired Connections
Hardwired systems represent the oldest and physically simplest method of firing a remote flash.

- Dumb Sync Cords: Utilizing a PC sync cord or a specialized 3.5mm jack cable, the photographer runs a physical wire directly from the camera body to the off-camera flash unit. This is known as a Dumb Sync, meaning the cable transmits only a raw electrical signal telling the flash to fire. It carries zero data regarding exposure calculations, forcing the photographer to manually walk over to the flash unit to adjust power levels.
- TTL Sync Cords: For those requiring automation, a TTL (Through-The-Lens) sync cord features specialized multi-pin connectors on both ends. One end plugs into the camera’s hot shoe, while the other provides a remote hot shoe. This allows the camera and flash to communicate electronically over the wire, retaining full TTL auto-exposure capabilities and high-speed sync (HSS) at a fraction of the cost of wireless TTL setups.
Pros: Exceptionally reliable, virtually zero latency, and remarkably inexpensive.
Cons: The physical cable severely limits working distance and creates a dangerous tripping hazard on busy sets.

2. Optical Triggers (Dumb Optical Mode)
Optical trigger systems replace physical wires with pulses of light—either visible or infrared. A basic optical setup involves placing a secondary flash into Optical Mode, which activates an internal photo-sensor acting as an electronic "eye."

When the master flash on the camera fires, the remote flash’s eye catches the burst instantaneously and fires concurrently, supplementing the scene with its own light.

Pros: Inexpensive, straightforward setup, and offers a practical operating range of 25 to 50 feet depending on environmental ambient light.
Cons: Requires an absolute line of sight between the master and slave units (you cannot hide a flash around a corner), provides only a dumb sync with no remote power control, and requires a minimum of two flash units.

3. Proprietary Pre-Flash Systems (Optical TTL)
Developed extensively by major legacy manufacturers like Canon and Nikon, these advanced optical systems utilize visible or infrared pulses to relay complex data.

During the pre-shutter lag window, the camera’s master flash emits a rapid series of microscopic pre-flashes. The camera measures this reflected light to calculate proper TTL exposure, after which the master flash fires a coded sequence of secondary optical pulses instructing the remote units regarding their respective power outputs. Only then does the main exposure flash fire in sync with the open shutter.

Pros: Retains full TTL automation, high-speed sync, and remote manual power control without requiring radio hardware.
Cons: Highly complex, expensive, prone to failing in bright daylight or when line-of-sight is obstructed by subjects or set design elements.

4. Modern Radio Triggers
Undoubtedly the superior technological standard in contemporary photography, radio triggers replace light pulses and wires entirely with robust radio frequencies.

Radio waves easily penetrate architectural walls, clothing, and other physical obstructions, completely eliminating line-of-sight requirements. Furthermore, radio systems boast staggering operating ranges extending hundreds of yards, making them ideal for expansive studio environments and demanding outdoor location shoots.

Historically restricted to manual-only dumb syncing, modern radio triggers have evolved dramatically. Advanced systems now seamlessly transmit full TTL and remote power control data natively. A prime milestone in this evolution was the 2012 debut of the Canon 600EX-RT, which revolutionized the industry by integrating radio-frequency control directly into flagship speedlights, effectively phasing out legacy optical transmission.

Supporting Hardware: Light Stands
Getting your flash off the camera is only half the battle; you must also mount and position it securely. Light stands are the foundational infrastructure of off-camera lighting, and selecting the right stand requires evaluating three critical parameters:

- Portability & Weight: Heavy-duty studio c-stands are exceptionally stable but cumbersome for on-location work. Lightweight, collapsible travel stands fold down into compact, easily transportable packages.
- Maximum Height: For portraiture, a light stand should extend to a minimum of 7 feet. This vertical clearance is essential to elevate the light source above a 6-foot subject, allowing for flattering downward-angled lighting ratios (such as classic Rembrandt or butterfly lighting).
- Build Quality-to-Price Ratio: As with most photography accessories, durability correlates directly with manufacturing materials. Seek out reputable brands that offer reinforced locking collars and sturdy metal legs rather than fragile plastic components.
Official Recommendations: Building a Budget Starter Kit
Navigating the thousands of available lighting components can paralyze beginners with choice. Through extensive field testing and industry research, we have curated an exceptional, highly cost-effective beginner off-camera flash kit that delivers professional results without breaking the bank.

1. The Core Flash Unit: Yongnuo YN560-III
- Estimated Retail Price: ~$75 USD
- Overview: The Yongnuo YN560-III is a legendary manual-only speedlight tailored specifically for photographers eager to learn off-camera lighting fundamentals without paying a massive brand-name markup.
- Key Features: While it lacks TTL functionality, its guide number compares favorably to OEM units costing triple the price. The flash head features full multi-directional rotation (ideal for bouncing), a manual zoom head, and a port for an external high-capacity battery pack. Most importantly, it features a built-in radio receiver, allowing it to pair directly with compatible triggers without requiring external receiver dongles dangling from its base.
2. The Wireless Trigger System: Yongnuo RF-603 II
- Estimated Retail Price: ~$20 to $35 USD (Available in single or twin packs)
- Overview: If you already own legacy or second-hand flash units, the Yongnuo RF-603 II transceiver kit allows you to convert any flash into a wireless marvel.
- Key Features: These basic, manual-only transceivers feature an ingenious auto-sensing transceiver design—meaning any unit can automatically act as either a camera-mounted transmitter or a flash-mounted receiver. Purchasing a twin-pack often includes a complimentary camera shutter-release cable, enabling photographers to trigger their cameras remotely from across the room. For creators who absolute require TTL, Yongnuo also offers budget-friendly TTL-compatible radio trigger variants priced around $200 USD.
3. The Supporting Stand: LumoPro LP605 or Equivalent
- Estimated Retail Price: ~$20 to $45 USD
- Overview: While entry-level 8-foot light stands from manufacturers like CowboyStudio or Impact provide adequate basic support for roughly $20 to keep total kit costs around the $100 mark, investing slightly more yields significant structural dividends.
- Key Features: The LumoPro LP605 retails for approximately $45 USD and offers superior build quality, exceptional folding portability, and robust stability, making it an ideal companion for the mobile location photographer.
Implications and Future Outlook
The democratization of off-camera flash technology has permanently altered the landscape of modern visual media. A decade ago, executing complex multi-light setups required heavy financial investments in proprietary studio strobes, bulky generator packs, and intricate infrared tethering systems.

Today, affordable third-party manufacturers like Yongnuo, Godox, and Neewer have leveled the playing field. High-performance radio triggers, robust manual speedlights, and modular modifiers are now accessible to hobbyists and student photographers alike.

As wireless protocols continue to advance—integrating seamlessly with mirrorless camera data streams and smartphone photography platforms—the barriers to professional-grade lighting techniques have effectively vanished. Mastering off-camera flash is no longer an exclusive luxury; it is an essential, highly achievable milestone for any photographer committed to mastering light.

Homework & Next Steps
Your primary assignment for this lesson is practical application: begin exploring and budgeting for your own starter off-camera flash system utilizing the recommendations outlined above. Ensure you preserve a modest portion of your budget for our next comprehensive installment.

In our upcoming lesson, Mastering Flash Modifiers, we will break down the wide array of shaping tools—including softboxes, umbrellas, snoots, and diffusers—explaining the unique physics of each modifier and how to deploy them to achieve your exact creative vision. Stay tuned!