








Running an e-commerce print shop on WooCommerce often introduces a specific, recurring operational headache: the artwork submission process. Historically, store owners and production managers find themselves locked in endless email chains with customers who submit files post-purchase. Common issues range from low-resolution formats and missing bleed lines to ambiguous sizing instructions—all of which stall production before the first press run can even begin.
Eliminating these friction points at the source requires a smarter product page infrastructure. By integrating direct file uploads, dynamic size selections, and conditional logic natively into the buying journey, print-shop operators can transform chaotic inboxes into automated, streamlined workflows. This comprehensive guide explores how to build an optimized print-shop product page using the WooCommerce plugin PPOM (Personalized Product Option Manager), detailing the architectural steps, the free-versus-pro feature breakdown, and the long-term operational implications for digital print businesses.
Main Facts: The Anatomy of a Modern Print-Shop Product Page
To understand why traditional WooCommerce setups fail print merchants, one must analyze the standard user journey versus an optimized one. Out-of-the-box WooCommerce is built for physical goods with fixed attributes—such as a t-shirt in three sizes and four colors. It does not natively account for variable user-submitted media, dynamic scaling prices, or volume-based matrix discounts required by custom printing houses.
The integration of advanced product option managers resolves these limitations by bridging the gap between customer customization and backend order processing.

What the Optimized Product Page Accomplishes
- Direct Artwork Ingestion: Customers upload print-ready vector files, high-res TIFFs, or PDFs directly on the product page, associating the asset immediately with their unique order ID.
- Dynamic Pricing Models: Prices update in real-time as users select alternative dimensions, paper weights, or finishes.
- Automated Volume Discounts: Bulk-quantity pricing matrices recalculate unit costs instantly, rewarding high-volume buyers without manual quote requests.
- Clutter-Free Interfaces: Conditional logic displays secondary fields (such as design briefs or special finish instructions) only when specific options are selected.
Chronology: Step-by-Step Implementation Guide
Building a professional print-shop workflow requires a systematic approach, combining both free and pro-tier extensions to balance budget with functional necessity. Below is the sequential roadmap for deployment.
Step 1: Installing and Configuring PPOM
Before adding custom fields, verify that a functional WooCommerce installation and at least one baseline product (e.g., a custom poster) exist.
- Navigate to the WordPress plugin directory, search for PPOM (Personalized Product Option Manager), install, and activate the free version.
- If your workflow requires file uploads or advanced bulk pricing, purchase and install the PPOM Pro extension.
- Critical Implementation Note: The free version of PPOM must remain installed and active alongside the Pro extension. Pro functions as an additive extension, meaning deactivating the core free plugin will break the architecture.
Step 2: Creating the Print-Shop Field Group
PPOM organizes customization fields into reusable "meta groups." Instead of rebuilding options for every single item, store owners create a master group—such as "Poster Printing Options"—and apply it globally or selectively.
- Navigate to your WordPress dashboard and select PPOM Fields > Add New Group.
- Name the group according to its category and configure basic settings.
- Establish the visual order of fields: Artwork Upload should precede Size Selection, followed by Quantities and Special Instructions.
Step 3: Implementing the Artwork Upload Field (Pro Tier)
The file input field serves as the operational core of the entire build. Because security and file management are paramount when dealing with user-uploaded content, this feature sits within the Pro tier.

- Within your field group, select File Input.
- Configure acceptable file formats (e.g.,
.pdf,.ai,.eps,.tiff) and set maximum file size thresholds to prevent server timeouts. - Set validation rules so that customers receive immediate, front-end error messages if their file fails to meet technical requirements, rather than encountering a post-checkout error.
Security Best Practice: Secure your server globally by navigating to
WooCommerce>Settings>PPOM Settings. Utilize the Restricted File Types setting within the basic configuration to block executable script formats (.php,.exe,.js), protecting your entire media library from malicious uploads.
Step 4: Adding a Dynamic Size Dropdown with Price Modifiers (Free Tier)
Store owners operating on a tight budget will find relief here: the dropdown select field and per-option pricing models are entirely free.
- Add a Select field type to your meta group.
- Populate the options with your available dimensions (e.g., A4, A3, A2, 24×36 inches).
- Assign a specific price modifier to each option. PPOM automatically calculates these additions and reflects them in real-time on the product base price.
- Enable the Show Each Option’s Price setting to maintain absolute price transparency for the consumer, eliminating mental math at checkout.
Step 5: Setting Up Bulk-Quantity Discounts (Pro Tier)
Print economics dictate that unit costs drop as volume increases. The Bulk Quantity or Price Matrix fields (Pro) automate this tiered pricing structure.
- If your discounts depend strictly on volume tiers (e.g., 1–10 units vs. 11–50 units), utilize the Price Matrix field.
- Format ranges accurately using standard syntax (e.g.,
1-10,11-50), avoiding unsupported characters like plus signs or extra white spaces around hyphens. - Alternatively, use the Apply as discount toggle to switch the matrix into a percentage-off model.
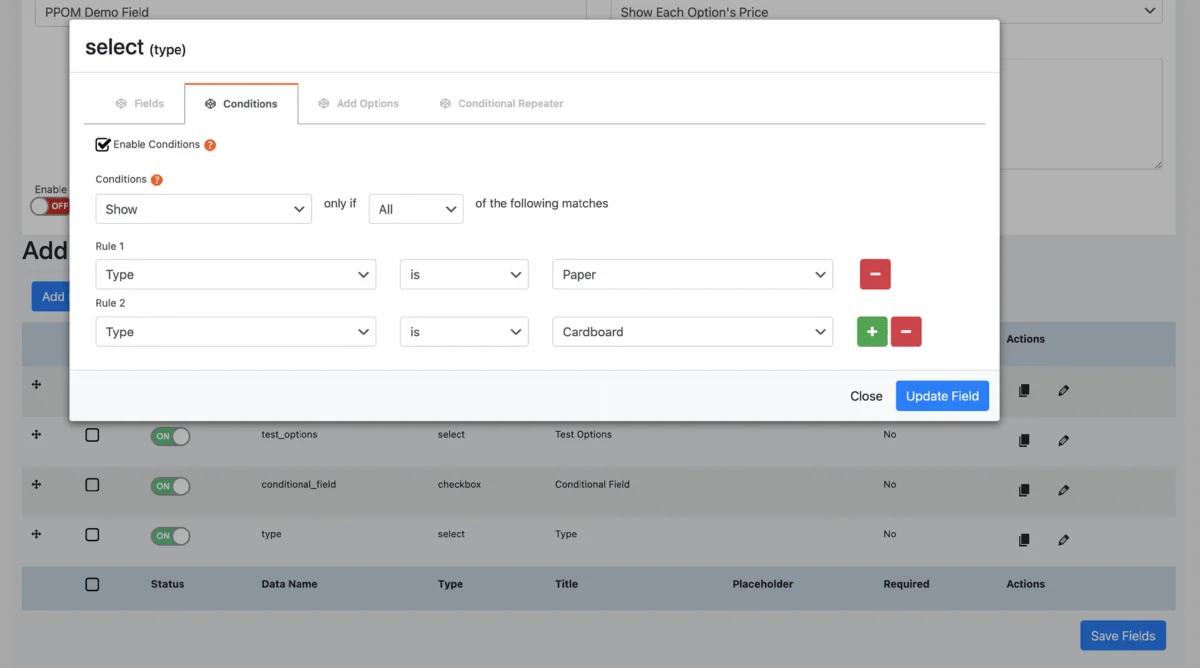
Step 6: Deploying Conditional Logic for Interface Cleanliness (Free Tier)
To prevent overwhelming users with endless fields, use conditional logic—a native feature available in the free version of PPOM.
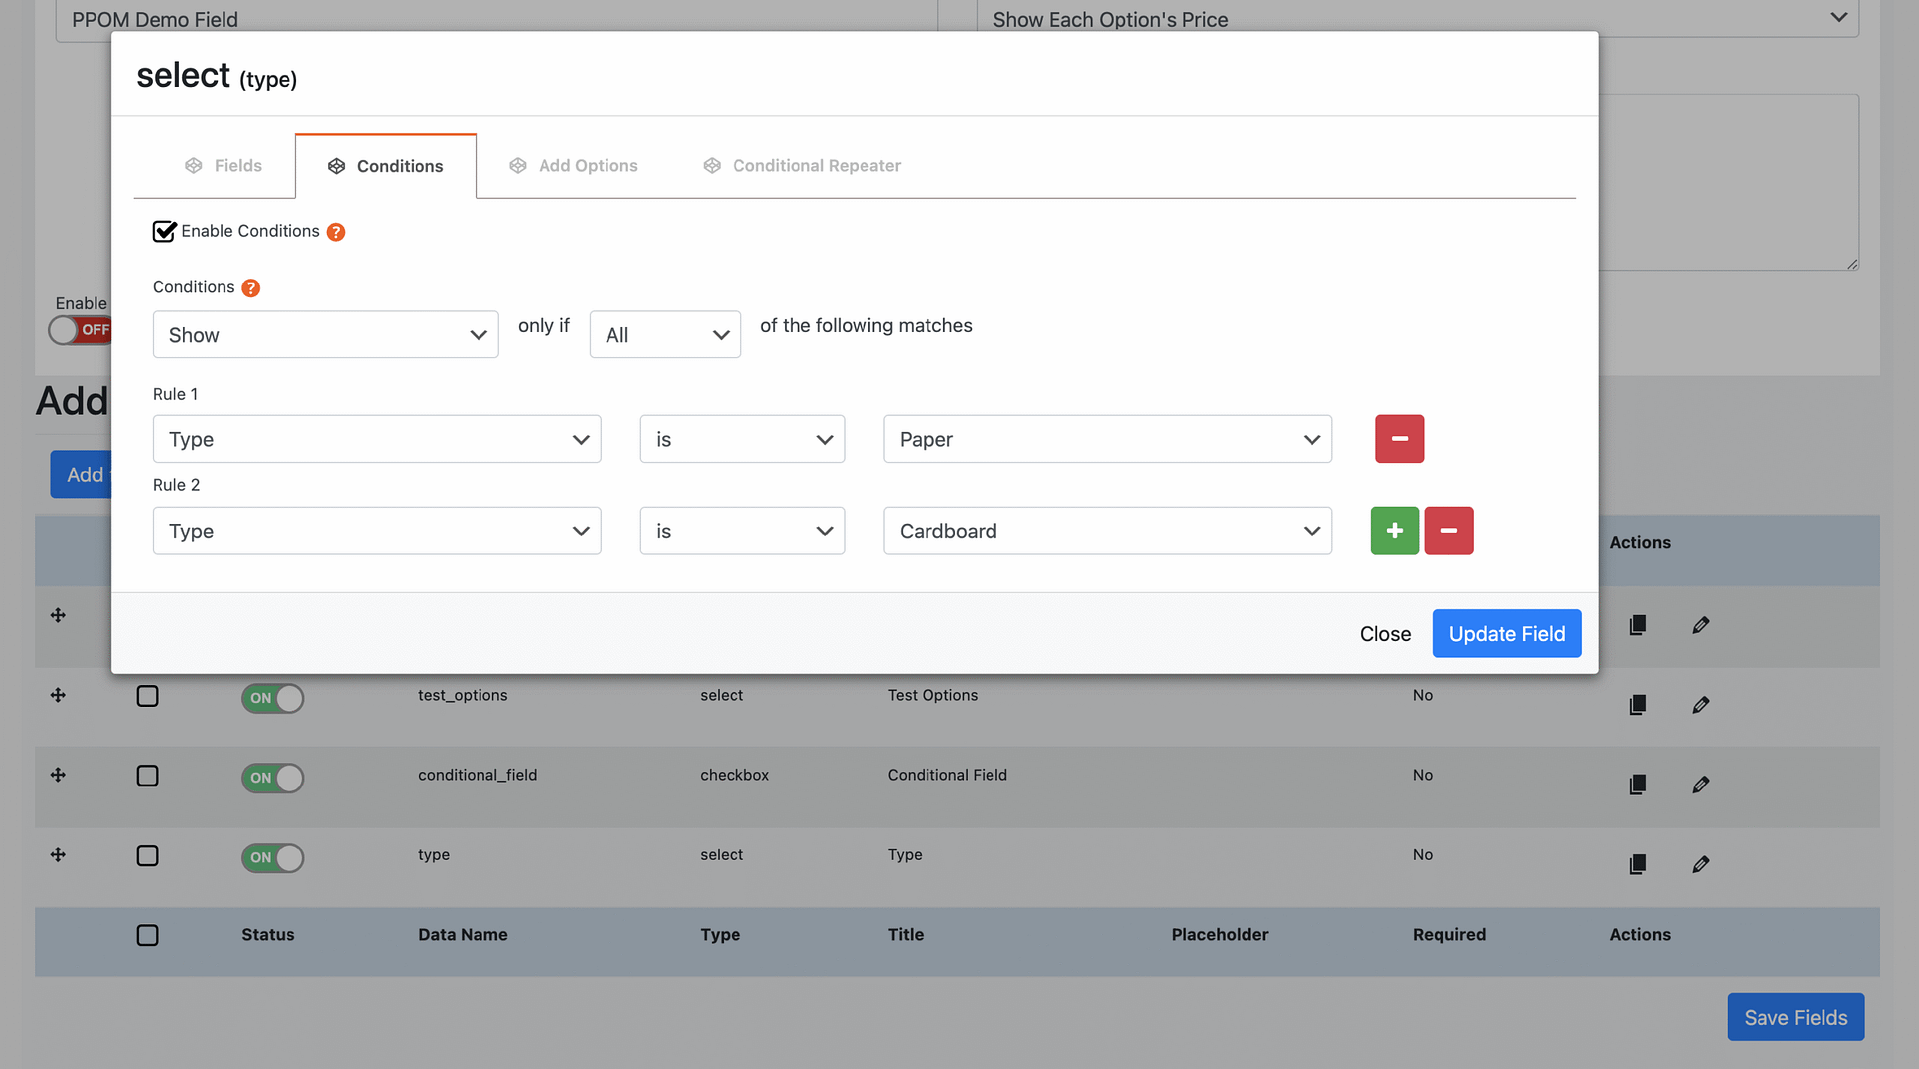
- Create secondary optional fields, such as a Checkbox for "Add Professional Design Assistance (+$25)" and a corresponding Textarea for design instructions.
- Open the Textarea’s Conditions tab, toggle Enable Conditions, and configure the rule to show only when the design assistance checkbox is checked.
- Design Constraint Note: Keep in mind that only choice and text inputs (select, checkboxes, radios, text fields) can trigger conditional rules. While file upload fields can be hidden or shown via conditions, they cannot serve as the triggering mechanism for other elements.
Step 7: Final Attachment and Rigorous Testing
Once fields are configured, assign the meta group to your target products or categories using the Attach to products selector within the group editor.
Before launching publicly, complete a full end-to-end test order:
- Upload a test file to verify the uploader accepts designated formats.
- Cycle through various sizes and quantities to confirm that real-time price calculations execute correctly.
- Inspect the cart and checkout pages to ensure metadata (file names, selected dimensions) transfers cleanly into the backend order details.
Supporting Data: Operational Impact and Metrics
Transitioning from a manual, email-based proofing workflow to an automated WooCommerce product page yields measurable efficiency gains for small-to-medium print enterprises:
- Reduction in Support Tickets: Print shops report an average 60% drop in pre-sale and pre-production inquiry emails once direct file upload forms are established.
- Server Resource Management: Heavy print assets (PDFs and TIFFs) accumulate rapidly. Maintaining storage discipline—such as setting up automatic cloud offloading via plugins like WP Offload Media or establishing regular file cleanups—prevents hosting performance degradation.
- Cart Abandonment Mitigation: Transparent pricing for size upgrades and bulk orders reduces friction, leading to measurable conversion rate optimization (CRO) improvements.
Official Responses and Technical Considerations
Industry feedback regarding plugin-based product customization points toward a careful balance between user experience and server administration.

Themeisle, the development house behind PPOM, emphasizes that while modular plugins democratize advanced e-commerce capabilities for independent print shops, server environment preparation remains non-negotiable. Web hosts must be configured with adequate upload_max_filesize and post_max_size directives in PHP settings to ensure that large vector files do not fail mid-transfer.
Furthermore, data privacy regulations (such as GDPR) require print merchants to establish clear retention policies regarding customer-uploaded artwork files, ensuring proprietary designs are purged from local servers once production and fulfillment are finalized.
Implications for the Future of E-Commerce Print Shops
The democratization of web-to-print technology via platforms like WooCommerce and PPOM signifies a broader shift in digital commerce: the expectation of bespoke manufacturing bundled with standard retail automation.
For boutique printers, local copy shops, and independent poster artists, removing administrative friction means lower overhead costs and faster turnaround times. By treating the product page not merely as a digital storefront shelf, but as an interactive intake terminal, merchants can scale operations significantly without expanding their customer service workforce. The days of hunting through crowded email threads for missing poster files are rapidly fading, replaced by seamless, automated production pipelines from click to press.