









Main Facts: Solving the Print Industry’s Digital Workflow Crisis
Running an independent print shop on WooCommerce has long been plagued by a persistent operational friction point: the artwork submission process. Traditionally, store owners find themselves trapped in endless email loops before a single job can go to press. Customers routinely place orders only to email their vector or raster files separately, attach files with insufficient resolution, or completely omit critical sizing details—leaving production teams to wonder why a finalized poster prints out blurry or misaligned. Every order transforms into an administrative game of tag, delaying fulfillment and inflating overhead costs.
The definitive solution to this pre-production bottleneck lies at the source of the transaction: an integrated file upload order form. By utilizing specialized product option managers, store operators can empower customers to upload their artwork directly on the product page, select specific dimensions, watch dynamic pricing updates in real-time, and securely bundle the attachment directly to the WooCommerce order.
This comprehensive guide examines how to transform a standard WooCommerce product page into a fully functional, automated print-shop ordering engine. Utilizing the PPOM (Personalized Product Option Manager) plugin—developed by Themeisle—store owners can seamlessly integrate file inputs, dynamic per-size pricing, volume discounts, and conditional logic.
Core Feature Breakdown
- Artwork Upload (Pro Tier): Direct customer file ingestion on the product page, eliminating email correspondence.
- Size Selection & Pricing (Free Tier): Dropdown menus equipped with per-option dynamic price modifiers.
- Bulk-Quantity Discounts (Pro Tier): Tiered pricing matrices designed to incentivize volume purchases.
- Conditional Logic (Free Tier): Dynamic form controls that display or hide fields based on user input, ensuring a clean and intuitive interface.
Chronology: Step-by-Step Implementation of a Print-Shop Product Page
Building an optimized, frictionless print-shop ordering workflow requires a methodical, step-by-step approach. Here is how to configure your WooCommerce store for maximum efficiency.

Step 1: Installing and Configuring PPOM
To begin, ensure you have a functional WooCommerce installation with at least one active product created.
- Navigate to the WordPress plugin directory and install the free version of PPOM (boasting over 20,000 active installations).
- If your print shop requires direct file uploads, purchase and install the PPOM Pro extension.
- Crucial Note: The free version of PPOM must remain installed and activated alongside the Pro extension. Pro operates as an addon rather than a standalone replacement.
Step 2: Creating the Print-Shop Meta Group
PPOM organizes custom fields into reusable sets known as "meta groups." Instead of rebuilding options for every item, a single group—such as "Poster Printing Options"—can govern an entire product category.
- Navigate to your WordPress dashboard and select PPOM Fields > Add New Group.
- Name the group clearly and configure the basic display settings to target your chosen print items.
Step 3: Implementing the Artwork Upload Field (Pro Tier)
Because file management is critical to print operations, the File Input field serves as the cornerstone of this build.
- Within your PPOM field group, select File Input from the available field types.
- Define acceptable file formats (e.g., PDF, TIFF, AI) and establish strict maximum file size limits.
- Configure the settings so that file restrictions are visibly displayed next to the uploader on the front end, preventing customer upload errors before they happen.
Step 4: Adding Size Dropdowns with Price Modifiers (Free Tier)
To give customers control over dimensions without inflating your software budget, leverage PPOM’s free Select field type.

- Add a Select field labeled "Poster Size."
- Input your available dimensions (e.g., A4, A3, 24×36 inches) and assign a specific add-on price modifier to each option.
- Enable the Show Each Option’s Price setting to display exact costs next to the dropdown menu, eliminating guesswork for the buyer.
Step 5: Establishing Bulk-Quantity Discounts (Pro Tier)
Print economics inherently reward volume. The 50th copy of a poster costs significantly less to produce than the first.
- Implement the Bulk Quantity or Price Matrix field to pass volume savings directly to the consumer.
- If utilizing the Price Matrix, structure your quantity ranges using standard formatting (e.g.,
1-10,11-50,51-100), ensuring no spaces surround the hyphens and avoiding unsupported operators like50+.
Step 6: Utilizing Conditional Logic (Free Tier)
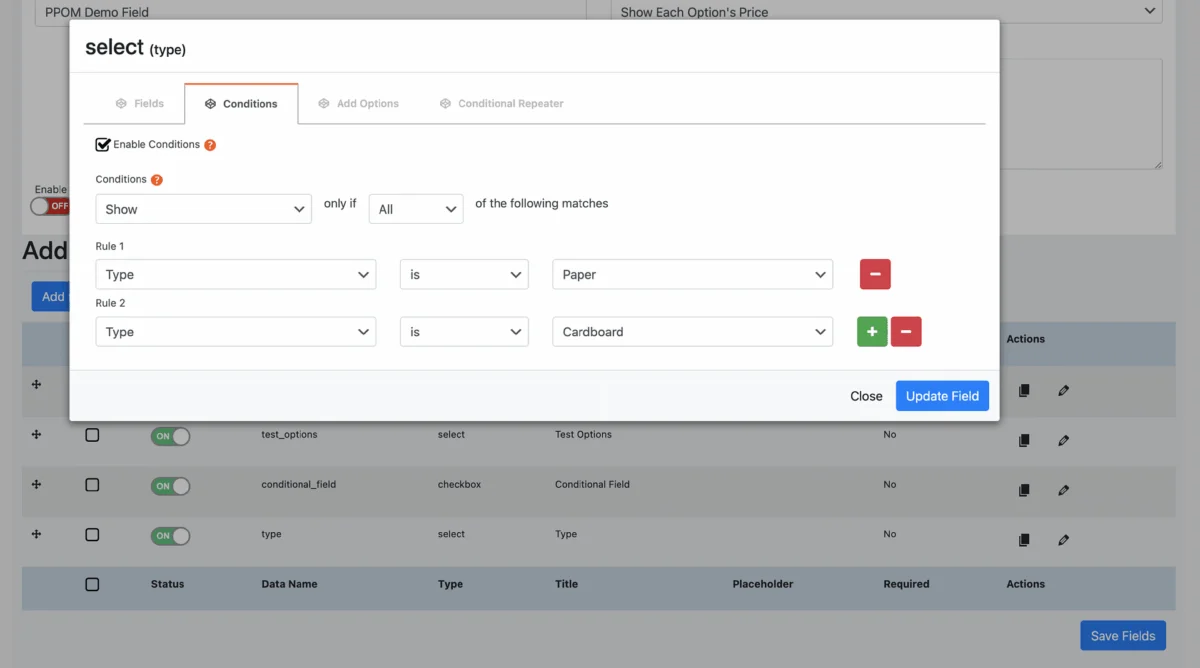
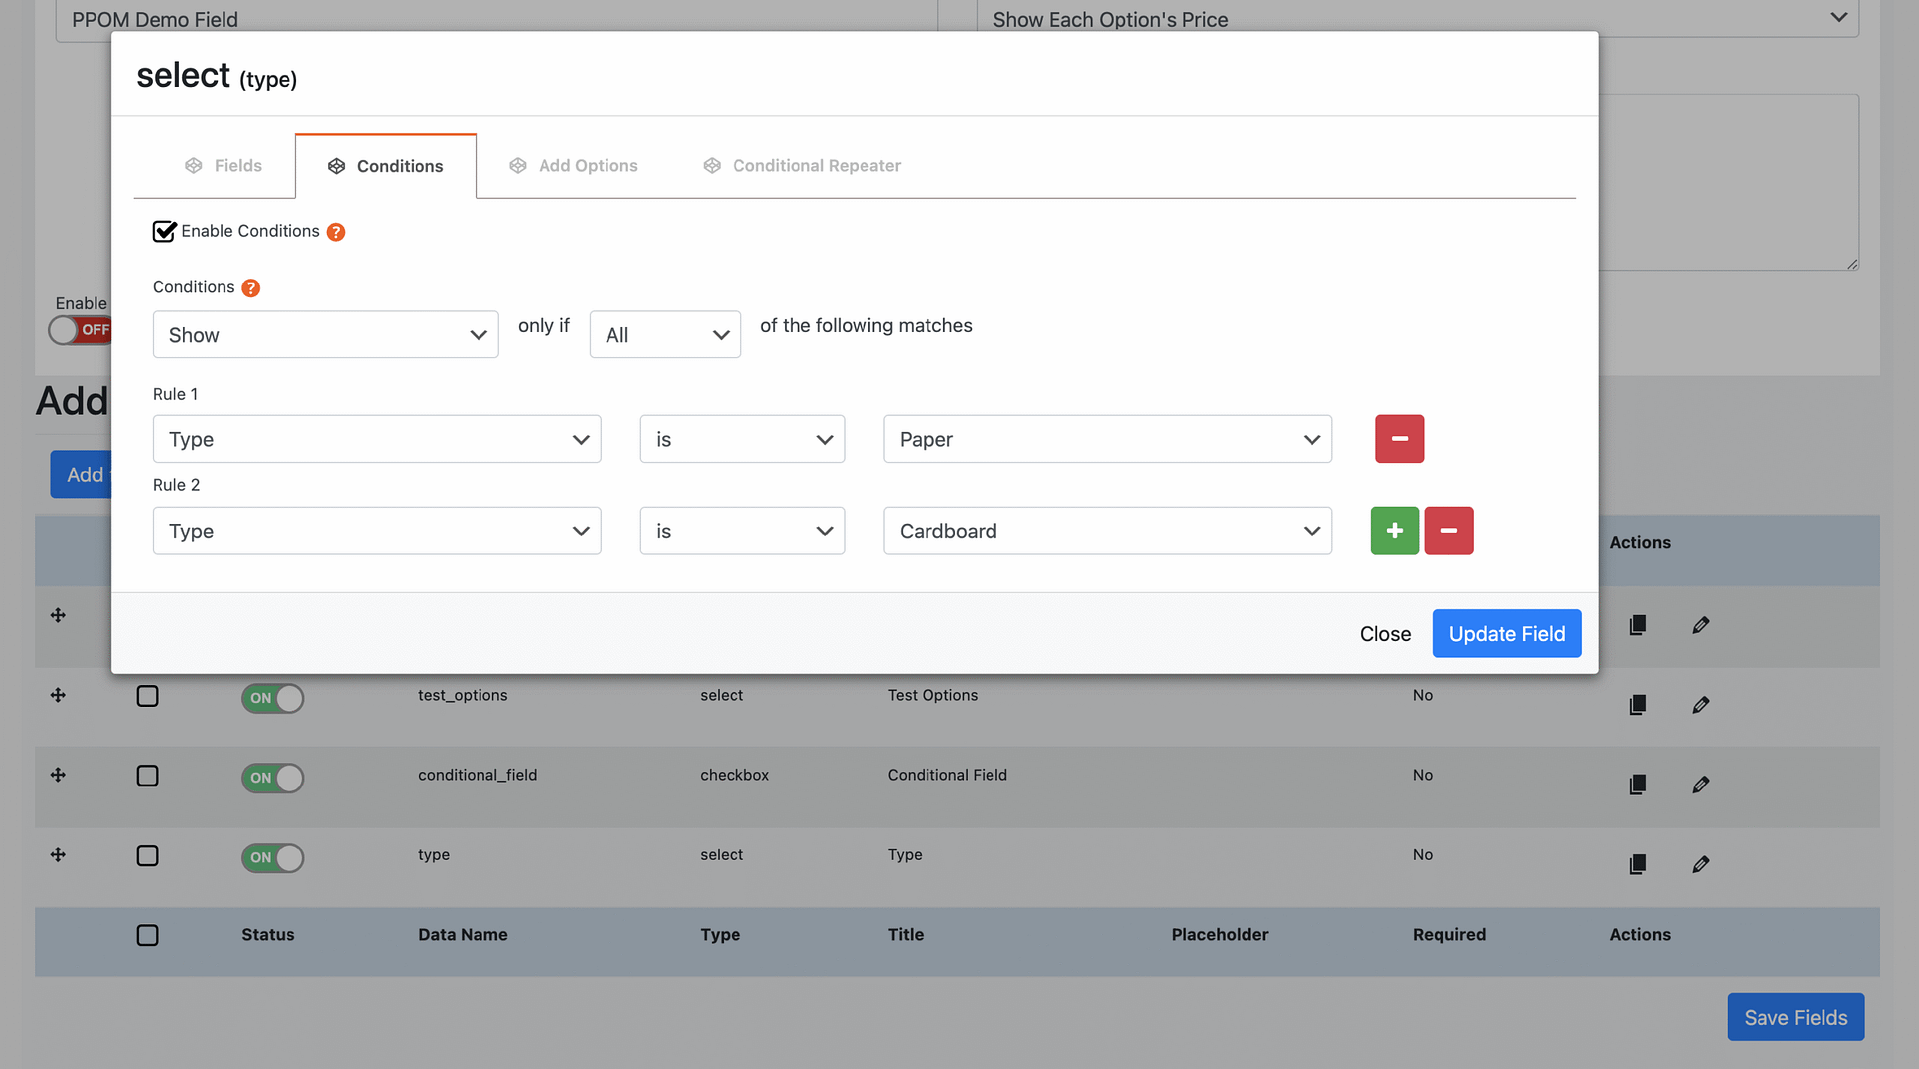
To prevent cognitive overload on complex product pages, employ PPOM’s free conditional logic engine.
- Create secondary fields—such as a Checkbox for "Add Professional Design Assistance (+$25)" and a corresponding Textarea for design instructions.
- Open the Textarea’s Conditions tab, enable the logic, and set the field to reveal itself only when the design assistance checkbox is actively selected.
Step 7: Attaching the Group and Running Final Reviews
Once configured, use the Attach to products selector to map the field group to your specific print items or categories. Utilize the Save & Print Preview feature to test the user interface from a buyer’s perspective.
Supporting Data: Economic and Technical Considerations
When integrating heavy file-upload systems into an e-commerce infrastructure, store owners must weigh feature sets against recurring operational costs and server health.
Licensing and Investment Structure
PPOM Pro operates on tiered pricing models. The Essential plan covers single-site implementations and includes all advanced features required for a standard print shop, including secure file uploads and matrix pricing. Higher-tier plans introduce advanced features like cart editing and variation matrices, which are typically unnecessary for streamlined operations.
Server Storage and Bandwidth Realities
Print-ready vector files, high-resolution TIFFs, and uncompressed PDFs consume significant server resources. Unchecked uploads can rapidly exhaust hosting disk space, slow down site backups, and degrade server performance. To mitigate this, store administrators should implement three operational rules:
- Enforce Strict File Type Restrictions: Block executable and script formats globally via
WooCommerce > Settings > PPOM Settings. - Set Realistic File Size Caps: Restrict individual uploads to reasonable thresholds while encouraging clients to optimize flattening layers.
- Establish Automated Cleanup Protocols: Regularly archive and offload fulfilled artwork files to cloud storage solutions (such as Amazon S3 or Google Cloud Storage) to keep your primary hosting environment lean.
Official Responses and Best Practices
Industry developers and WooCommerce optimization specialists emphasize that user experience (UX) is the primary driver of conversion in specialized e-commerce sectors like printing. According to Themeisle’s integration documentation, removing friction during the product configuration stage directly correlates with reduced cart abandonment rates.
Furthermore, support engineers strongly recommend executing a comprehensive "Test Order Audit" before launching updated product pages to the public.

The Pre-Launch Test Order Checklist
- [ ] File Upload Verification: Successfully upload a high-resolution PDF to confirm that file type restrictions and size limits function correctly.
- [ ] Dynamic Pricing Check: Select various sizing options and bulk quantities to verify that add-on pricing calculates accurately in the cart.
- [ ] Conditional Logic Audit: Toggle dependent fields (such as add-on design services) to ensure visibility triggers operate smoothly.
- [ ] Order Backend Confirmation: Complete a live checkout to confirm that the customer’s uploaded artwork successfully attaches to the backend WooCommerce order metadata for the production team.
Implications: The Future of E-Commerce for Independent Print Shops
The integration of advanced product option managers and direct file-upload systems signals a broader shift toward automation within the independent print and merch industry. By bridging the gap between customer-facing storefronts and backend production workflows, print shop owners can fundamentally alter their daily operations.
Operational Efficiency
Eliminating the "please resend your artwork" email chain saves hours of administrative labor per week. Staff can pivot away from chasing client files and focus entirely on job execution, prepress checks, and fulfillment.
Scalability
As print shops expand their product offerings—scaling from standard posters to custom apparel, signage, and promotional materials—reusable meta groups ensure that catalog updates remain manageable. Store owners can apply unified file-upload and sizing frameworks across hundreds of SKUs with minimal development overhead.
Ultimately, transitioning to an automated, self-service ordering model enhances customer satisfaction by providing transparent pricing, instant feedback, and a seamless checkout experience. For WooCommerce-based print shops, implementing these digital workflows is no longer merely a luxury—it is the baseline requirement for modern, scalable growth.